CentOS7 详细安装教程 — 图文介绍超详细
- 一、安装前的准备
- 二、下载镜像文件
- 三、开始安装
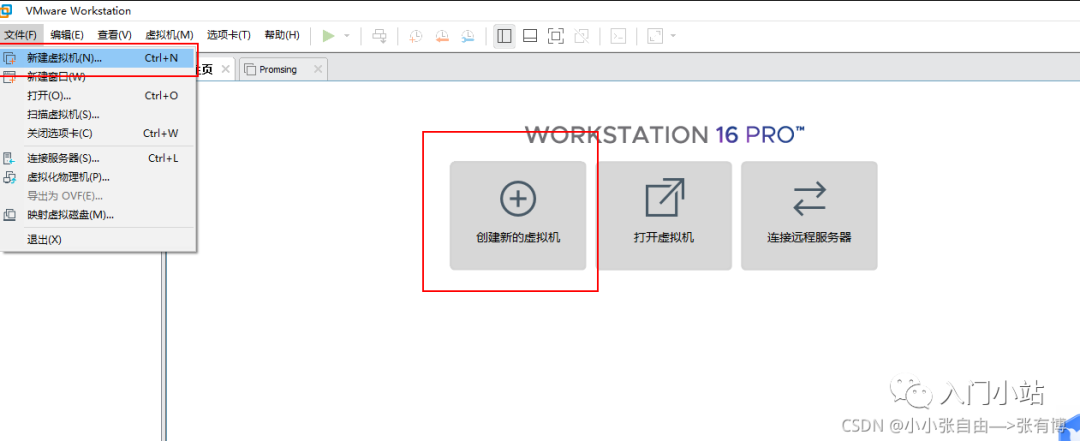
- 第 1 步:文件 → 新建虚拟机 或 直接点击 创建新的虚拟机 图标
- 第 2 步:选择 典型(推荐)→ 下一步
- 第 3 步:稍后安装操作系统
- 第 4 步:选择操作系统和版本
- 第 5 步:输入虚拟机名称和安装路径
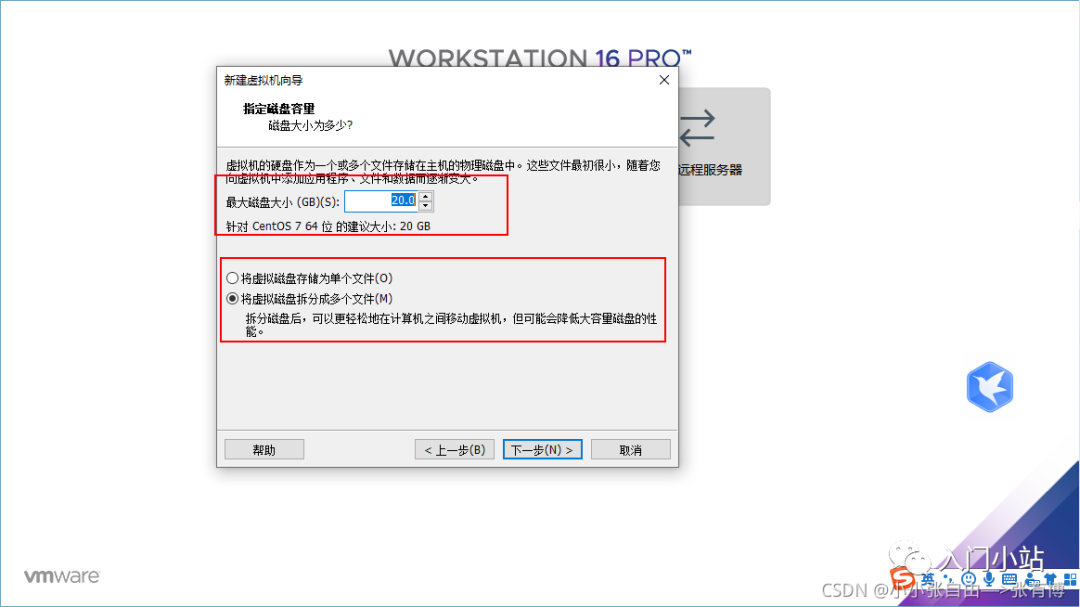
- 第 6 步:设置磁盘大小,本文选择默认配置 20G
- 第 7 步:自定义硬件
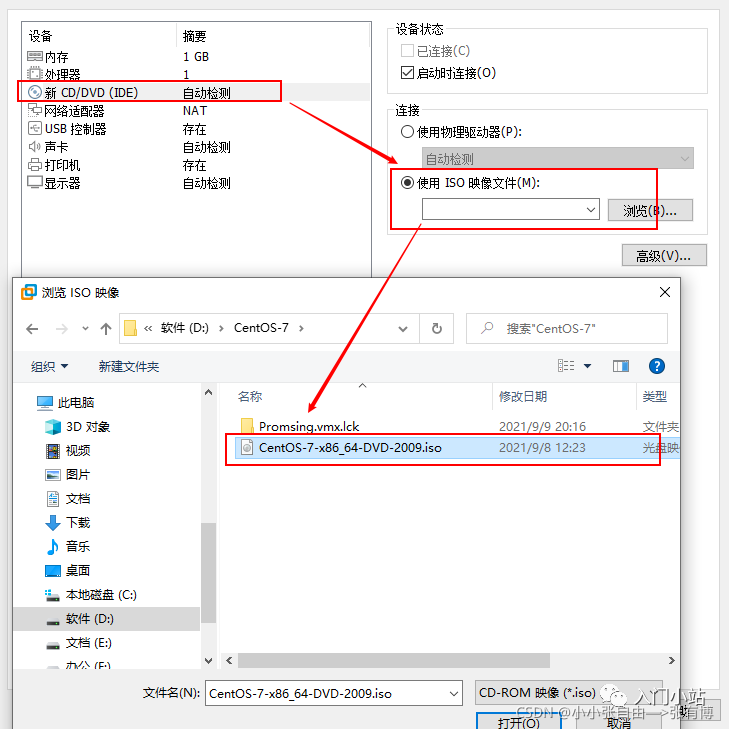
- 第 8 步:选择 CentOS 安装镜像文件
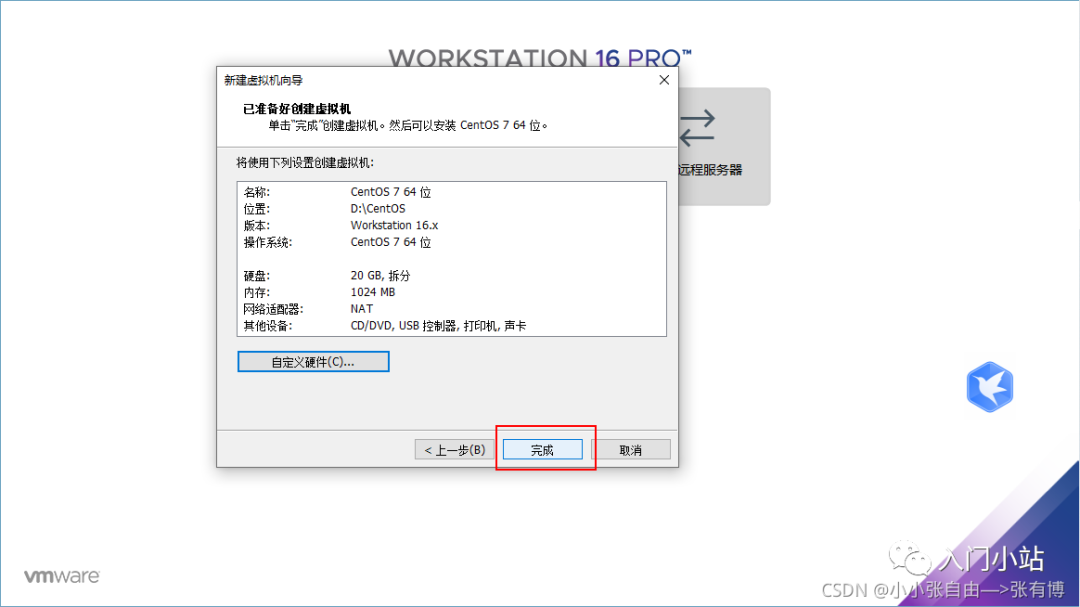
- 第 9 步:点击完成
- 四、进行初始化配置
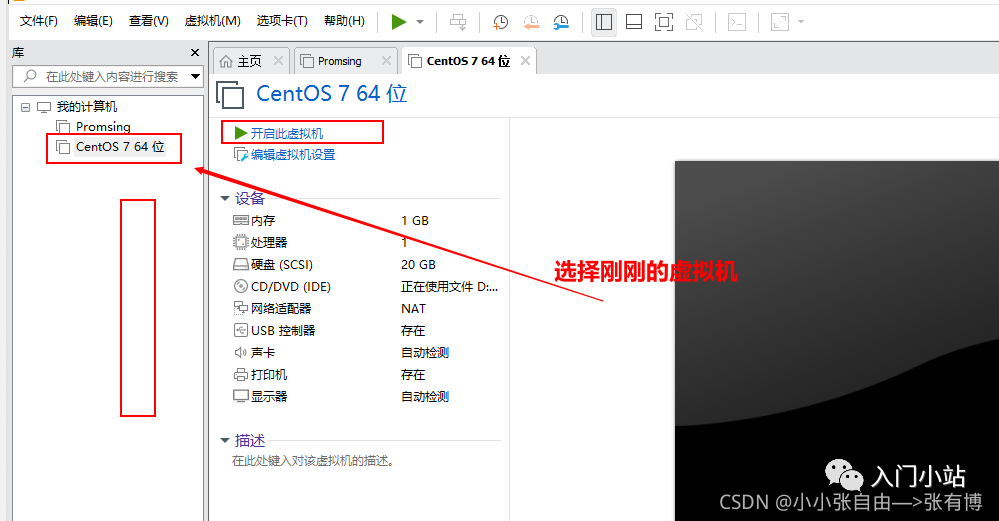
- 第 1 步:启动虚拟机
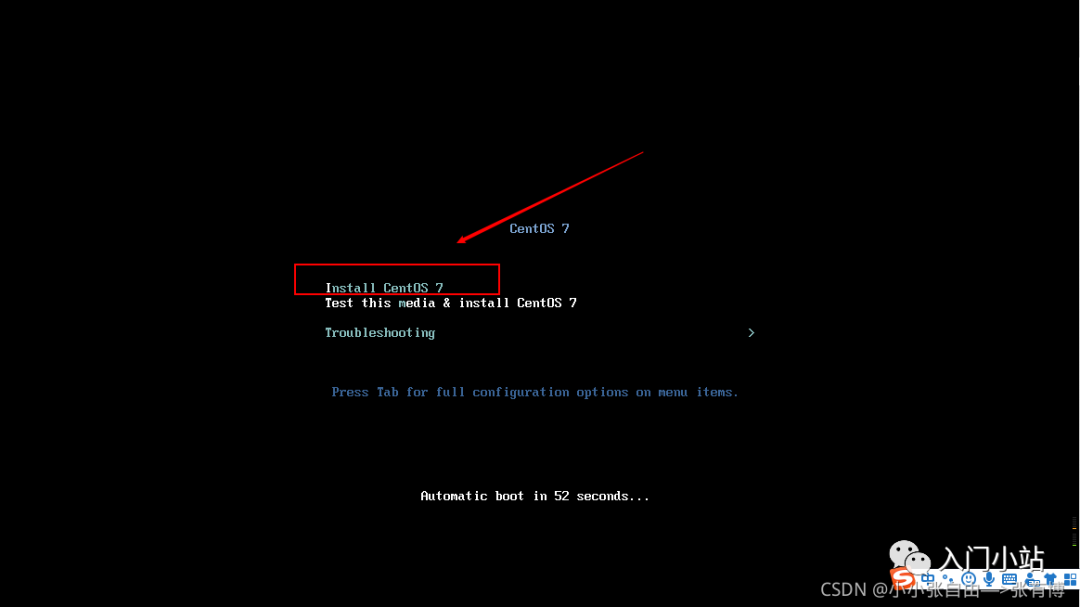
- 第 2 步:选择第一项,Install CentOS 7,等待一会儿
- 第 3 步:选择语言,这里选择的是中文简体
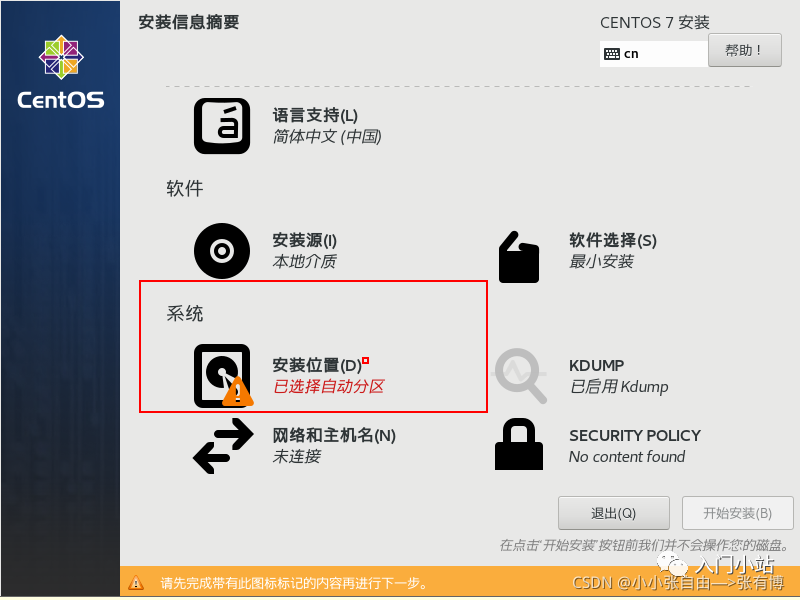
- 第 4 步:进行安装信息的配置,选择安装位置
- 第 5 步:进行设置目标位置,配置分区
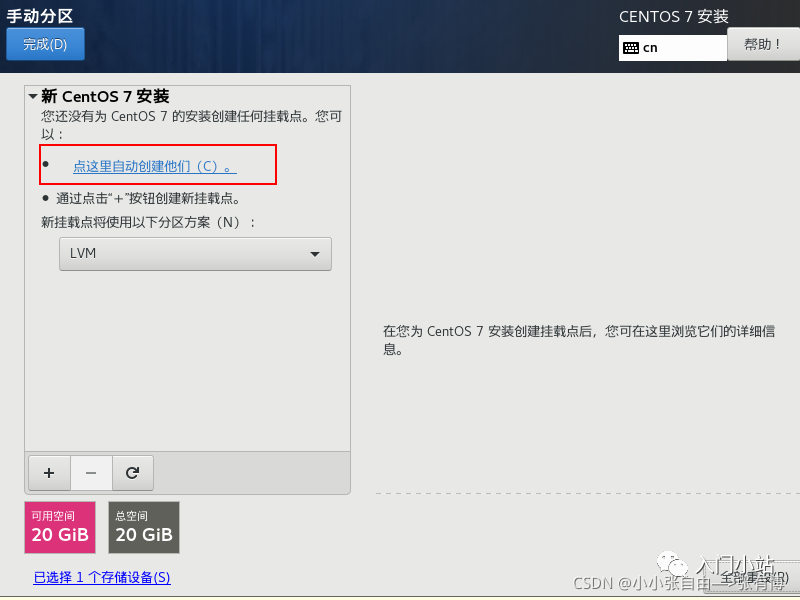
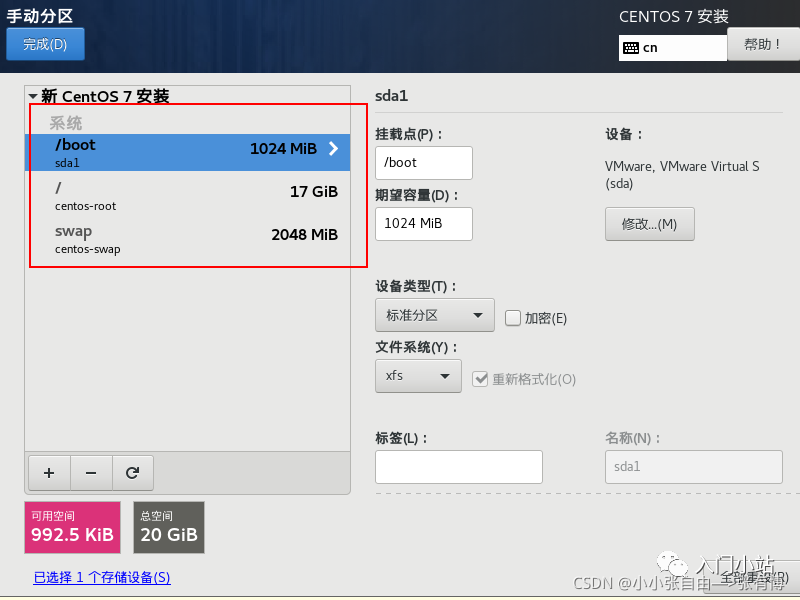
- 第 6 步:选择自动创建它们,然后进行分区设置,这里选择默认配置,也可以安装自己的需求自定义设置。
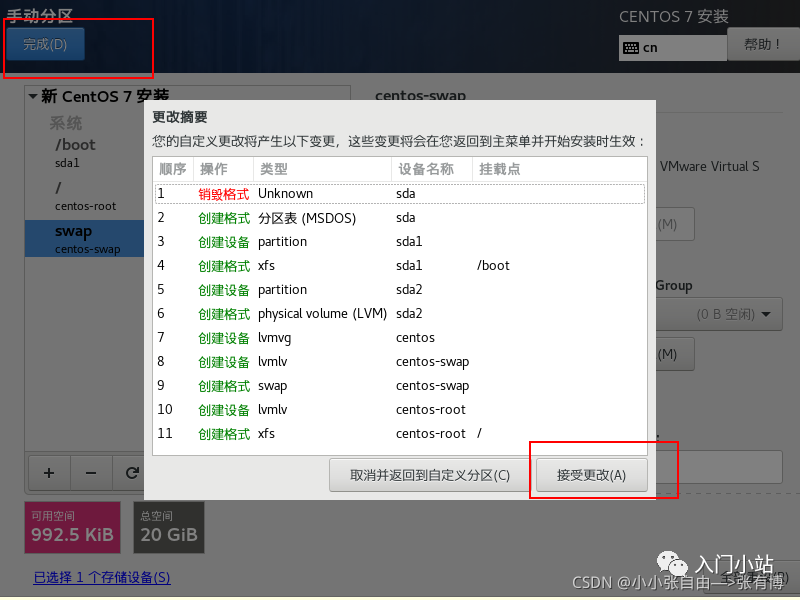
- 第 7 步: 设置好之后完成,保存接收更改
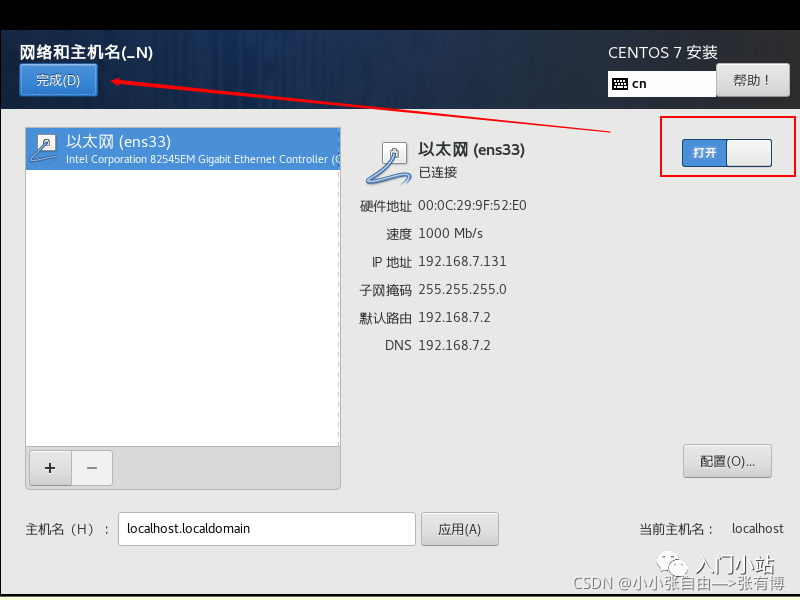
- 第 8 步: 选择网络和主机名
- 第 9 步:安装位置与网络都已配置好,开始安装
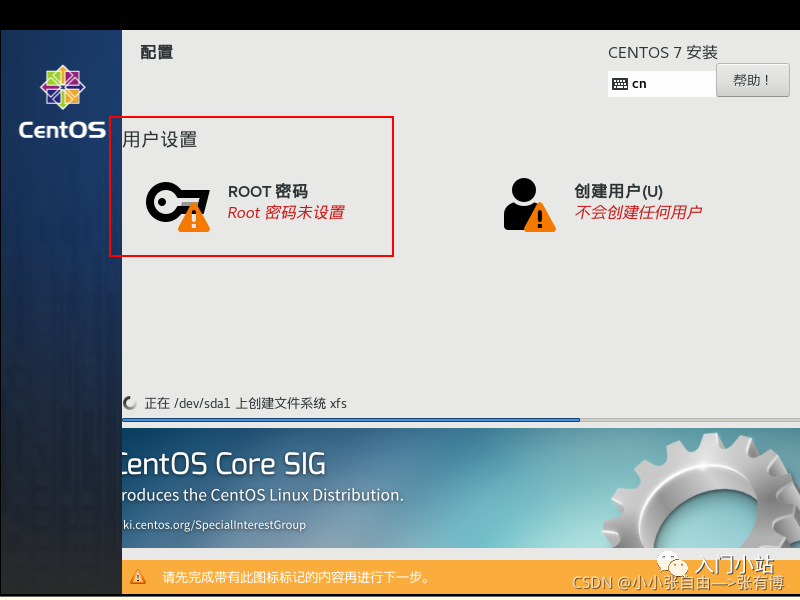
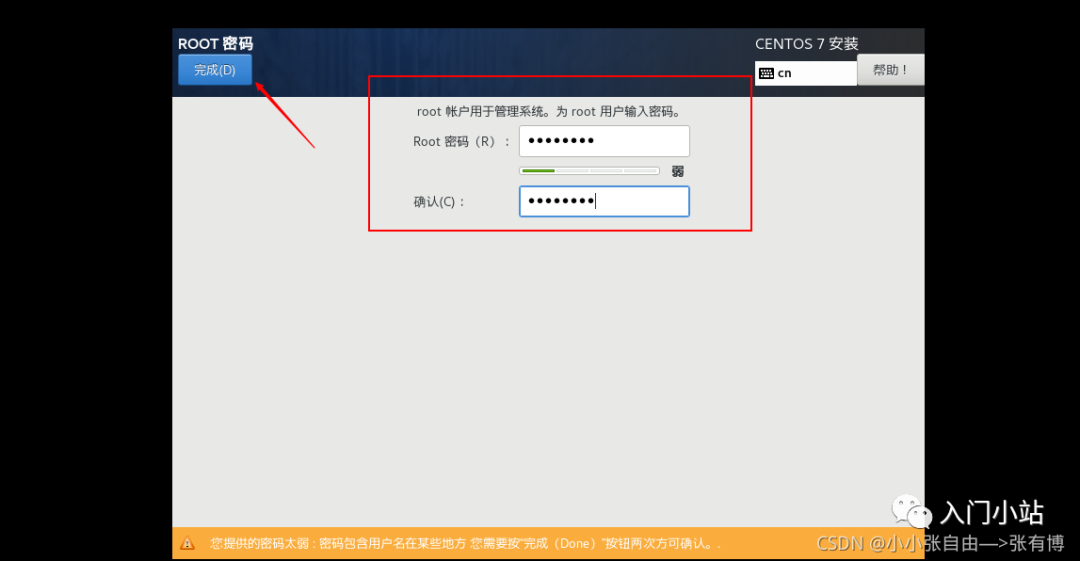
- 第 10 步:系统安装的同时,设置 root 账户的密码,**密码很重要,要记住!!**
- 第 11 步:等待一会儿,安装完成,重启设备
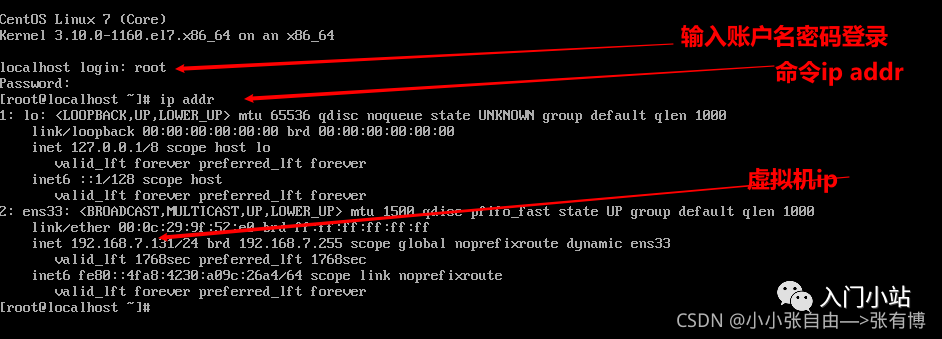
- 第 12 步:选择第一项,输入账户名密码登录,账户名 root,密码是上一步自定义的
VMware
VMware 是一款[虚拟机]软件就是通过软件模拟的具有完整硬件系统功能的、运行在一个完全隔离环境中的完整计算机系统。
与物理机一样,虚拟机是运行操作系统和应用程序的软件计算机。虚拟机包含一组规范和配置文件,并由主机的物理资源提供支持。每个虚拟机都具有一些虚拟设备,这些设备可提供与物理硬件相同的功能,但是可移植性更强、更安全且更易于管理。
官网:https://www.vmware.com/cn/products/workstation-pro/workstation-pro-evaluation.html
CentOS
CentOS 是免费的、开源的、可以重新分发的开源操作系统。全名为 “社区企业操作系统(Community Enterprise Operating System)”,提供长期免费升级和更新服务,自由使用。国内最大的服务器操作系统,现在基本所有的互联网公司后台服务器都采用 CentOS
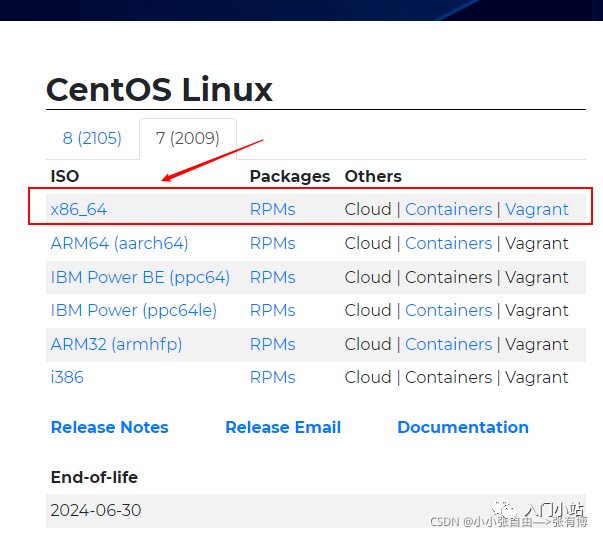
官网:https://www.centos.org/download/
安装步骤
一、安装前的准备
1.VMware 的安装本文不再介绍,正常安装即可
-
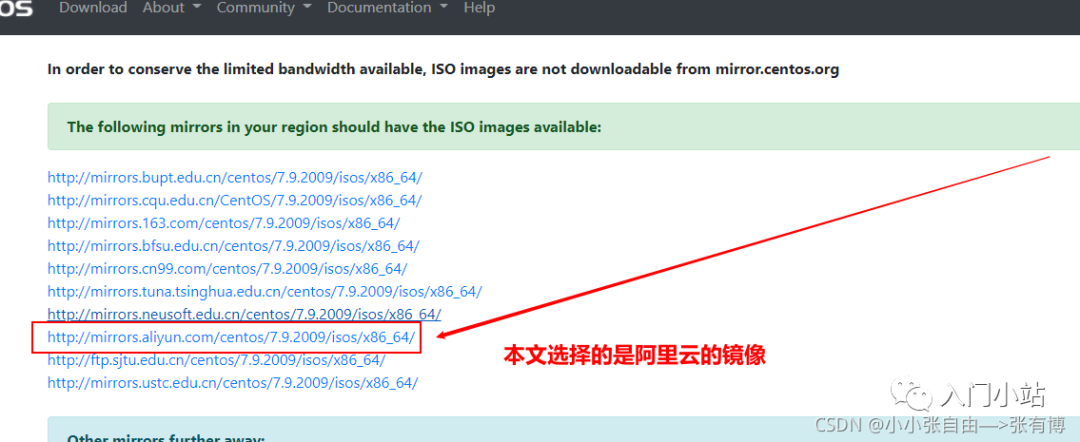
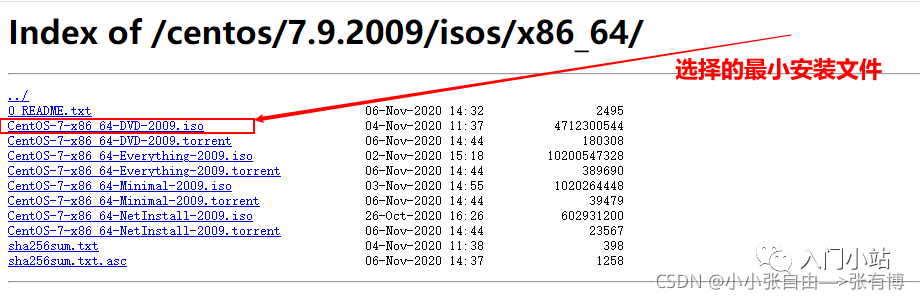
下载 CentOS 7 的镜像文件
二、下载镜像文件
三、开始安装
第 1 步:文件 → 新建虚拟机 或 直接点击 创建新的虚拟机 图标
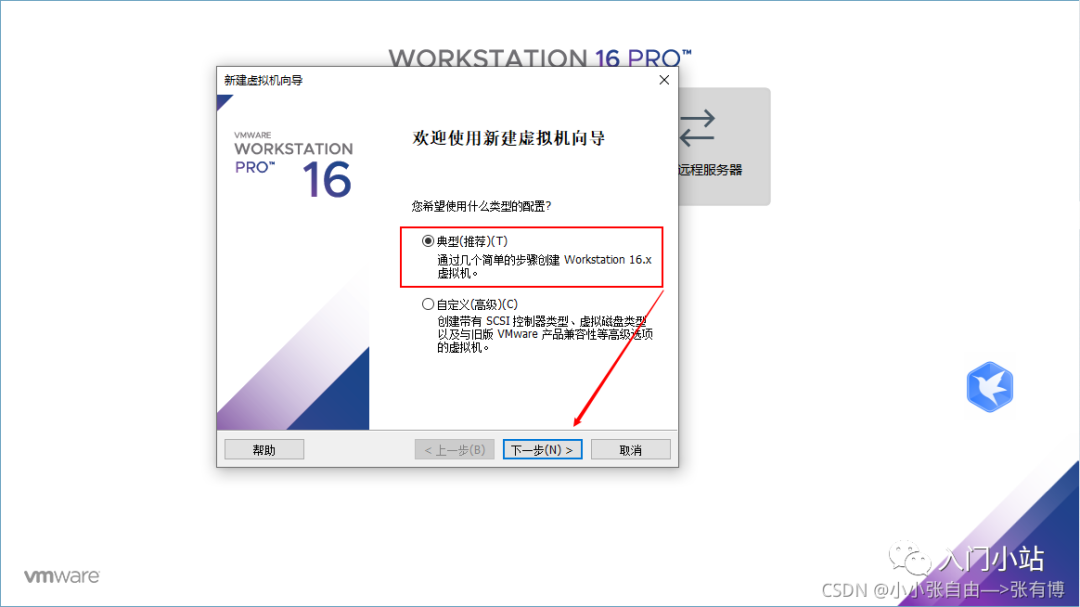
第 2 步:选择 典型(推荐)→ 下一步
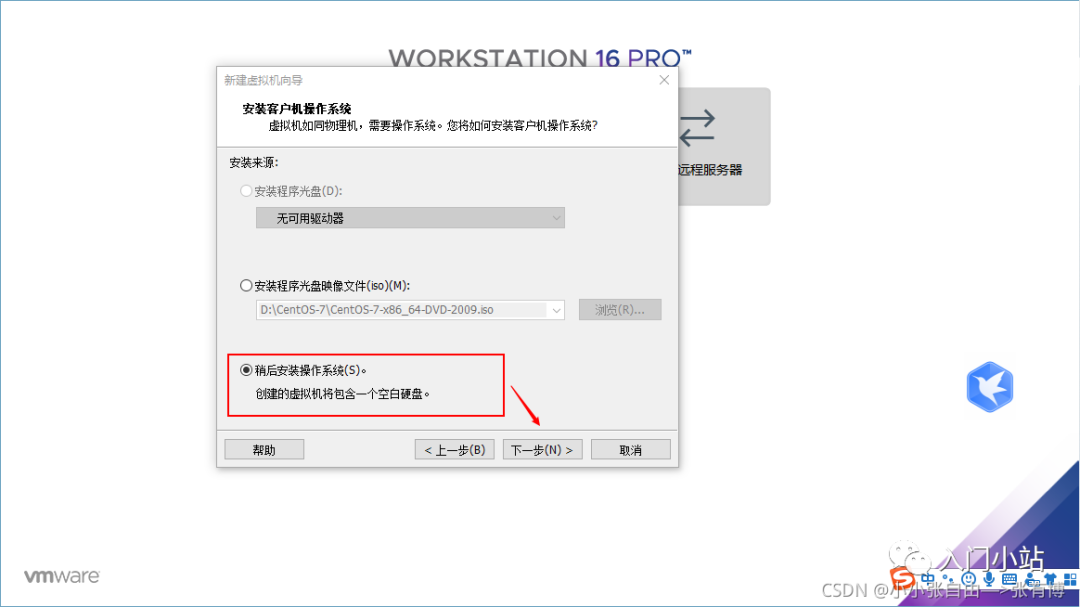
第 3 步:稍后安装操作系统
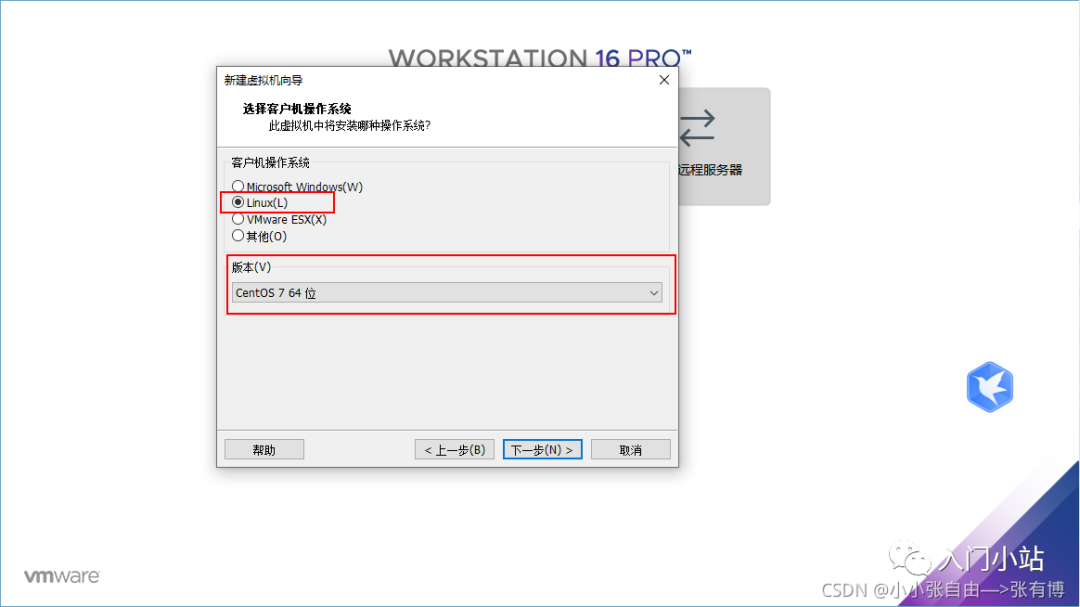
第 4 步:选择操作系统和版本
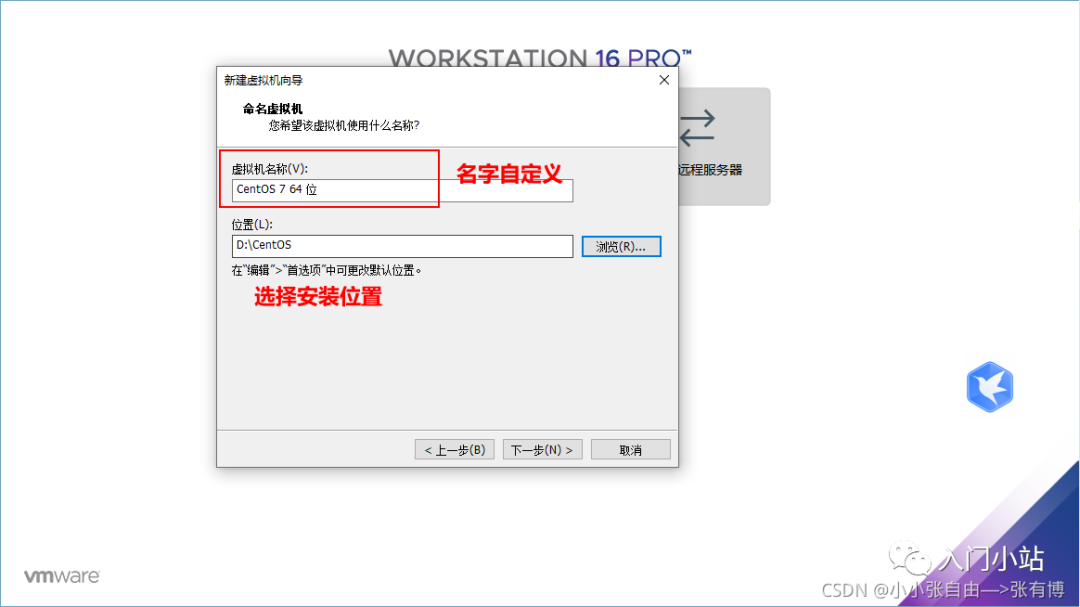
第 5 步:输入虚拟机名称和安装路径
第 6 步:设置磁盘大小,本文选择默认配置 20G
第 7 步:自定义硬件

第 8 步:选择 CentOS 安装镜像文件
第 9 步:点击完成
四、进行初始化配置
第 1 步:启动虚拟机
第 2 步:选择第一项,Install CentOS 7,等待一会儿
第 3 步:选择语言,这里选择的是中文简体

第 4 步:进行安装信息的配置,选择安装位置
第 5 步:进行设置目标位置,配置分区

第 6 步:选择自动创建它们,然后进行分区设置,这里选择默认配置,也可以安装自己的需求自定义设置。
第 7 步: 设置好之后完成,保存接收更改
第 8 步: 选择网络和主机名
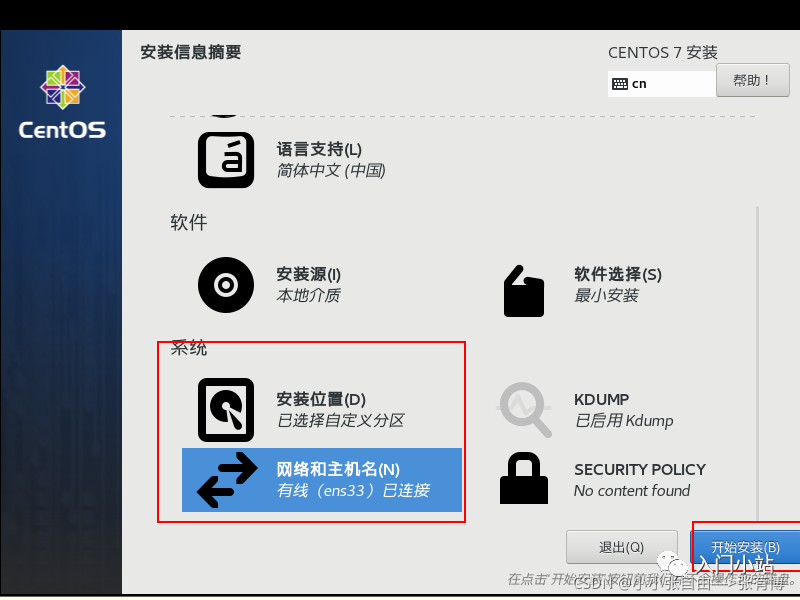
第 9 步:安装位置与网络都已配置好,开始安装
第 10 步:系统安装的同时,设置 root 账户的密码,密码很重要,要记住!!
第 11 步:等待一会儿,安装完成,重启设备

第 12 步:选择第一项,输入账户名密码登录,账户名 root,密码是上一步自定义的
输入命令 ip addr 查看自己的虚拟机的 ip
本篇文章来源于微信公众号: 入门小站